Cloud9でDjangoを使ってRDSに接続するまで
RDSに接続先用のMySQLを作成する
Cloud9の環境を作成する
- AWSのコンソールにログイン > Cloud9 > [Create enviroment]ボタンで環境作成を開始します。
- [Name environment]で項目を入力して[Next step]ボタンを押下します。
- [Name] : 環境の名前
- 今回は「PythonDjango」にしました
- (任意)[Description] : 環境の説明文
- [Name] : 環境の名前
- [Configure settings]で項目を入力して[Next step]ボタンを押下します。
- [Environment type] : 環境タイプで、いずれかのオプションを選択
- 選択値の説明はEC2 環境を作成する - AWS Cloud9参照
- 今回は「Create a new EC2 instance for environment (direct access):環境用の新しいEC2インスタンスを作成する(直接アクセス)」にしました
- [Instance type] : インスタンスタイプを選択
- EC2の料金に関わるので小さめに「t2.micro」を選択しました
- [Platform] : 作成されるAmazon EC2 インスタンスのタイプを選択
- [Cost-saving setting] : コスト削減の設定で、指定した待機時間Cloud9を使っていないと自動でEC2を停止してくれます
- Network settings (advanced)
- [Environment type] : 環境タイプで、いずれかのオプションを選択
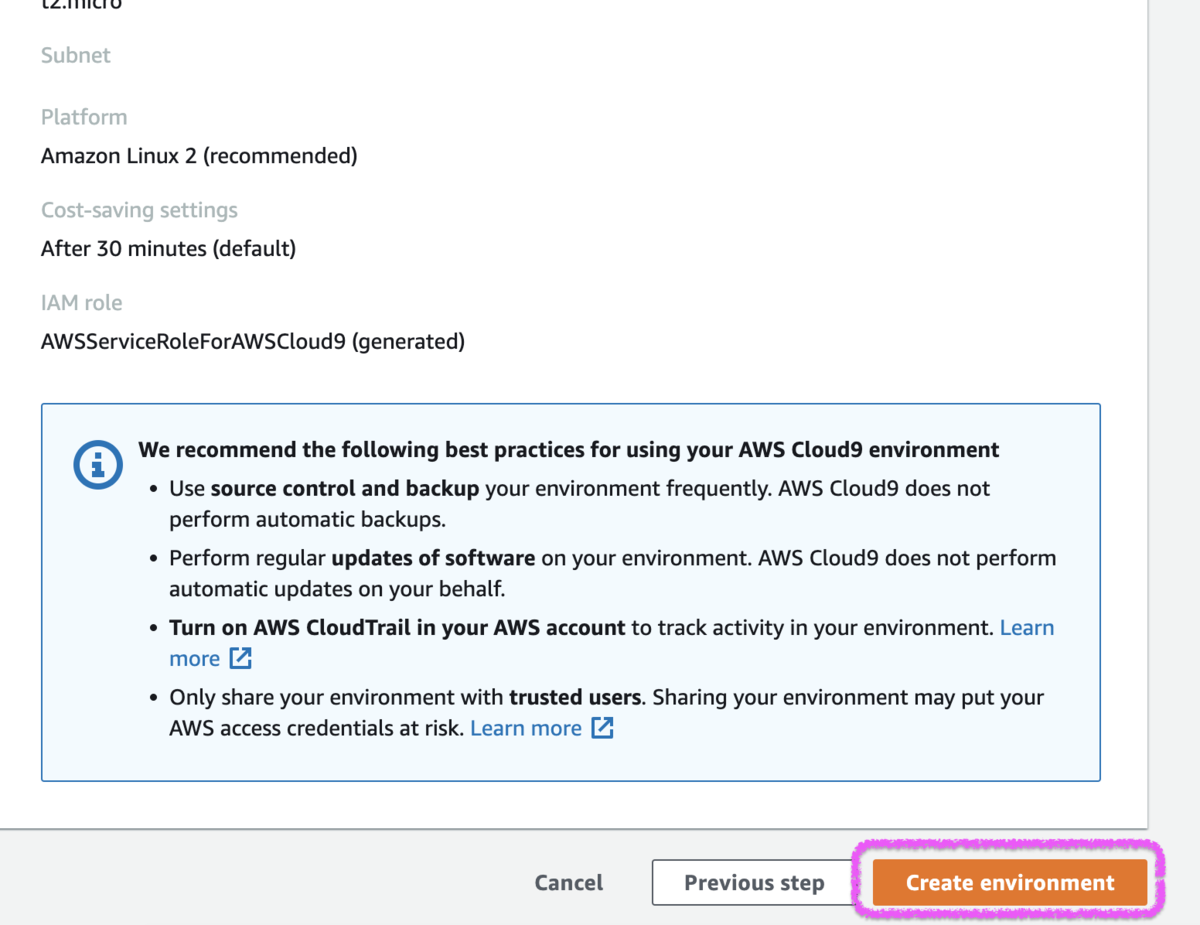
- [Review]で内容を確認して[Create environment]ボタンでCloud9の環境を作成します。
- 環境が作成されるとIDEの画面が起動します。

Python環境の設定
- [Preferences] > [Python Support] > [Python version]で「Python3」を設定します。
- [Window] > [New Terminal]でターミナルを起動
- PythonとDjangoのバージョンを確認します。
- Djangoは既にインストールされているはずですが、インストールされていなければ
pip install Djangoでインストールします。
- Djangoは既にインストールされているはずですが、インストールされていなければ
- RDSのMySQLに接続するために「PyMySQL」をインストールします。

# Pythonのバージョン確認
$ python -V
Python 3.7.10
# Djangoのバージョン確認
$ python -m django --version
2.0.2
# PyMySQLをインストールする
$ pip install PyMySQL
Defaulting to user installation because normal site-packages is not writeable
Collecting PyMySQL
  Downloading PyMySQL-1.0.2-py3-none-any.whl (43 kB)
     |████████████████████████████████| 43 kB 2.3 MB/s
Installing collected packages: PyMySQL
Successfully installed PyMySQL-1.0.2

Cloud9からRDSへ接続できるように設定する
参考 : AWS Cloud9 環境を作成してAmazon Aurora Serverless MySQL データベースに接続する | DevelopersIO
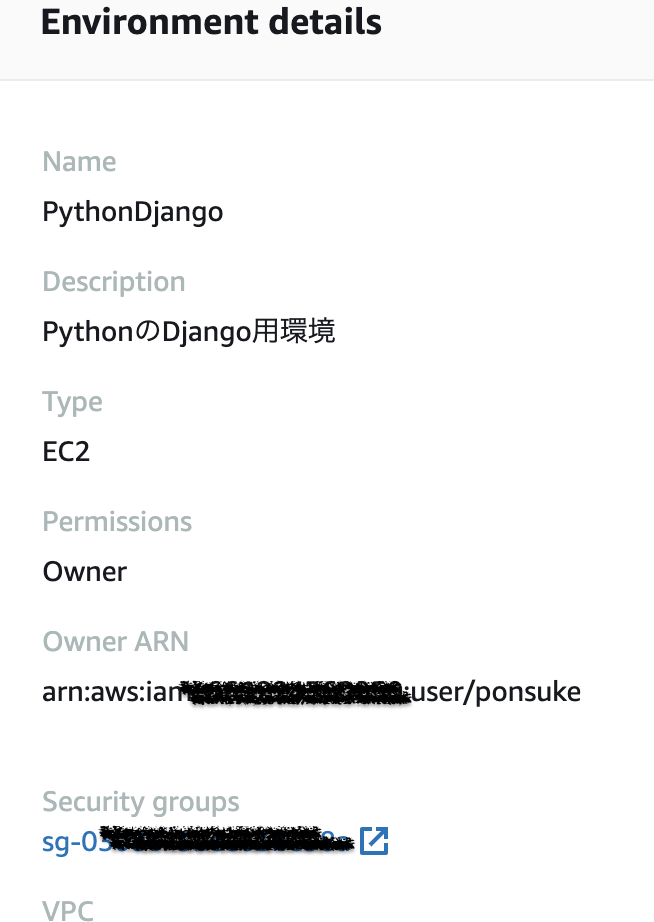
- Cloud9に割り当てられたセキュリティグループを確認します。
- Cloud9のコンソール > [Your environments] > 作成したCloud9の環境名リンク
- [Security groups]に表示されているセキュリティグループIDをメモします。
- Cloud9のコンソール > [Your environments] > 作成したCloud9の環境名リンク
- RDSのセキュリティグループにCloud9のセキュリティグループを設定する
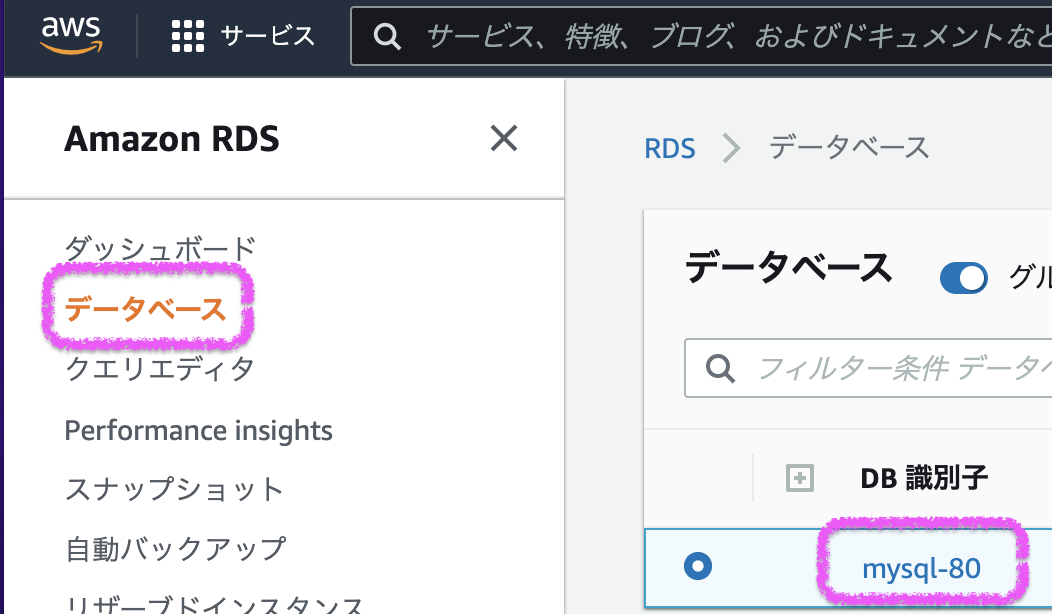
- RDS コンソール(https://console.aws.amazon.com/rds/) > [データベース] > 接続対象の[DB識別子]リンクを押下します。
- [接続とセキュリティ]タブ > [VPC セキュリティグループ]のリンクからセキュリティグループの画面を表示
- [インバウンドルール]タブ > [インバウンドルールを編集]ボタン > [ルールを追加]ボタン
- 以下を設定して[ルールを保存]ボタンで設定を追加します。
- タイプ : MySQL/Aurora
- ソース : Cloud9のセキュリティグループID
- RDS コンソール(https://console.aws.amazon.com/rds/) > [データベース] > 接続対象の[DB識別子]リンクを押下します。
- Cloud9のIDEを起動し、ターミナルでRDSに接続確認します。

# mysqlコマンドはデフォルトでインストールされています(便利だ・・・)
$ mysql --version
mysql  Ver 15.1 Distrib 10.2.38-MariaDB, for Linux (x86_64) using  EditLine wrapper

# RDSに接続する
$ mysql -h {RDSに作ったMySQLのエンドポイント} -P 3306 -u {マスターユーザー} -p
Enter password: {マスターユーザーのパスワード}
Welcome to the MariaDB monitor.  Commands end with ; or \g.
Your MySQL connection id is 12
Server version: 8.0.28 Source distribution

Copyright (c) 2000, 2018, Oracle, MariaDB Corporation Ab and others.

Type 'help;' or '\h' for help. Type '\c' to clear the current input statement.

# 「myDatabase」というデータベースはあるけれど
MySQL [(none)]> show databases;
+--------------------+
| Database           |
+--------------------+
| information_schema |
| myDatabase         |
| mysql              |
| performance_schema |
| sys                |
+--------------------+
5 rows in set (0.04 sec)

MySQL [(none)]> use myDatabase
Database changed

# まだテーブルは何にもない
MySQL [myDatabase]> show tables;
Empty set (0.00 sec)

MySQL [myDatabase]>

Djangoプロジェクトを作成する
django-admin startproject {プロジェクト名}でプロジェクトを作成します。
RDSへの接続を設定する

manage.py
manage.pyで「PyMySQL」を利用できるよう設定します。
#!/usr/bin/env python
import os
import sys
# PyMySQLを利用できるように以下を追記する
import pymysql

pymysql.install_as_MySQLdb()
# ...省略...
setting.py
setting.pyの[DATABASES]部分を設定します。 「OPTIONS」部分を記載しないとModuleNotFoundError: No module named 'MySQLdb' - Qiitaとなるので注意です。
# ...省略...
DATABASES = {
    'default': {
        'ENGINE': 'django.db.backends.mysql',
        'NAME': 'データベース名',
        'USER': 'マスターユーザー名',
        'PASSWORD': 'マスターユーザーのパスワード',
        'HOST': 'RDSに作ったMySQLのエンドポイント',
        'PORT': '3306',
        'OPTIONS': {
            'init_command': "SET sql_mode='STRICT_TRANS_TABLES'",
        },
    }
}
# ...省略...
接続確認する
# 接続確認する
$ python manage.py migrate
Operations to perform:
  Apply all migrations: admin, auth, contenttypes, sessions
Running migrations:
  Applying contenttypes.0001_initial... OK
  Applying auth.0001_initial... OK
  Applying admin.0001_initial... OK
  Applying admin.0002_logentry_remove_auto_add... OK
  Applying contenttypes.0002_remove_content_type_name... OK
  Applying auth.0002_alter_permission_name_max_length... OK
  Applying auth.0003_alter_user_email_max_length... OK
  Applying auth.0004_alter_user_username_opts... OK
  Applying auth.0005_alter_user_last_login_null... OK
  Applying auth.0006_require_contenttypes_0002... OK
  Applying auth.0007_alter_validators_add_error_messages... OK
  Applying auth.0008_alter_user_username_max_length... OK
  Applying auth.0009_alter_user_last_name_max_length... OK
  Applying sessions.0001_initial... OK